
Pinch sticks: How to easily check square with deadly accuracy
Everything To Know About
Pinch Sticks and How To Make Them
Do you need to make absolutely sure that a frame or casework you’re building is perfectly square? Frustrated with trying to read a bent tape measure when taking inside measurements?
All of these problems can be easily fixed with one little tool: the push stick.
In this article, I’ll give you a detailed guide to what a push stick is, some of the ways it’s used, how to make one, and how to check square with one.
What are pinch sticks?
Pinch sticks have many alternate names (pinch rods, squaring sticks, bar gauges, measuring sticks) but no matter what they’re called, at their core, these tools are used to measure and reference the distance between two points.
They are the ultimate tool for reference measuring; where you find dimensions based on existing parts instead of plans or measurements.
They take the guesswork out of measuring which is one of the real keys to super-accurate woodworking.
In their simplest form, pinch sticks are just two pieces of wood with pointed ends, held together somehow. That could be with anything from your own fingers (hence the “pinch”) to painter’s tape, spring clamps (and clamp pressure), or even CA glue. Although that last one doesn’t make for a repeatedly useful tool.
By sliding the pointed tips closer together or further apart you can very accurately measure the diagonals of a casework carcass, or measure the inside distance between two points.
In their more refined forms, they can be ultra-fancy. Some of the woodworking tool suppliers even offer kind of spendy kits to build your own, like the Veritas Pinch Sticks and EZ Pinch Stick kit. Even the behemoth Rockler has some skin in the game with their bar gauge kit.
But if you have some scraps, a little bit of time, and some cheap hardware you can very quickly and easily make your own set of squaring sticks. I have plans available here, or click on the button below.
How to make pinch sticks: the basic version
A quick and very easy version of pinch rods (or sticks) can readily be found and made in almost any shop.
Simply take two pieces of scrap wood, cut them to half the length of whatever you’re measuring plus 4-8” and add pointed tips to one end of each stick. A good overall measurement for the stick stock is about ¼” x ¾”.
For example: You want to square a cabinet carcass that is 14” from corner to corner diagonally. You’d find or dimension your scrap to ~¼” thick by ~¾” wide, then cut your pinch sticks to ~12” each. This way when you stack them on top of each other there is enough overlap to keep them straight and rigid.
How to make pinch sticks: the advanced version
For a more advanced version of squaring sticks, you could always purchase one of the fancy kits I listed above, but where’s the fun in that?
We’re craftswrights! We like to make things ourselves!
Plus there’s just something special about making your own hand tool (or 7) from scratch and using it.
My version of the squaring stick, while not as easy to make as the basic version above, is still relatively straightforward. By using tongue and groove joints the sticks keep their rigidity and orientation even at long distances, and the only hardware parts you need are a bolt, a washer, and a wingnut.
I used this type of squaring stick A TON in this wooden tool chest build.
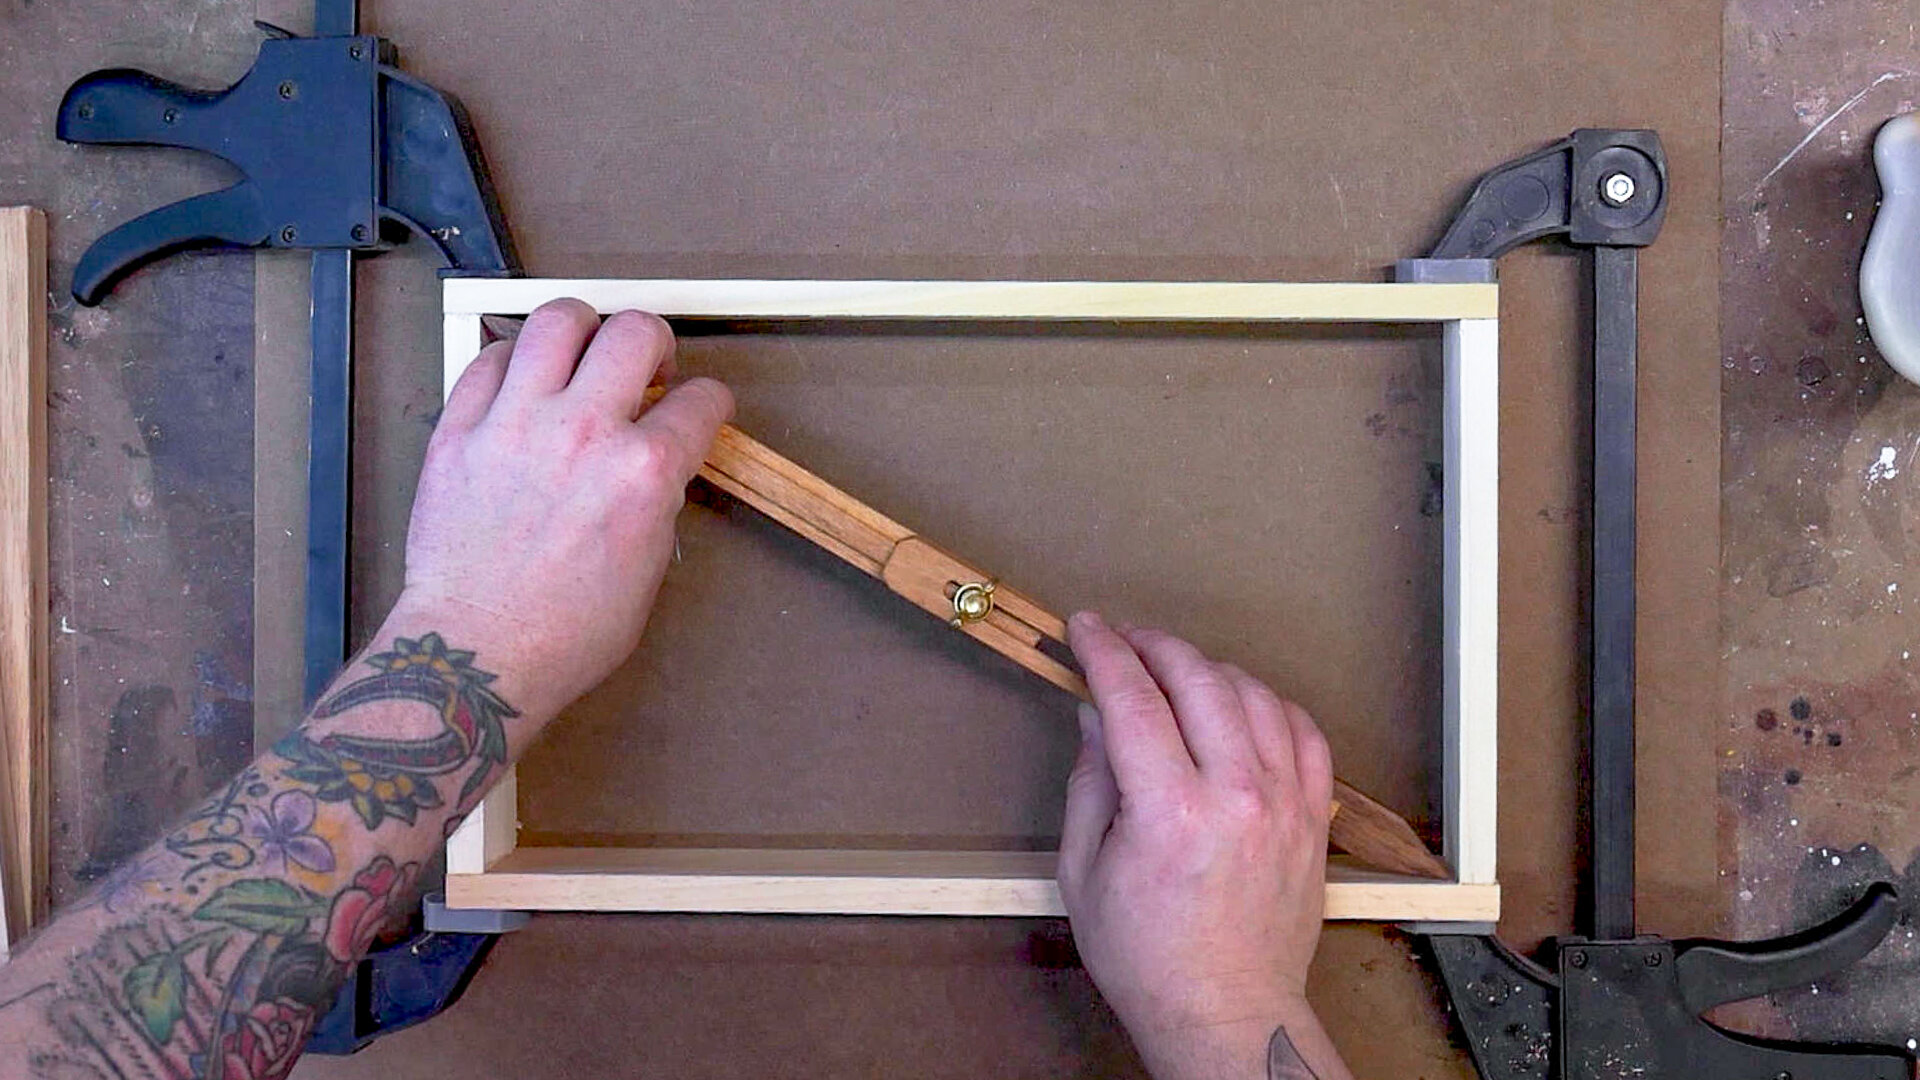
How to check square with Pinch Sticks
Probably the most important part of any frame or casework is making absolutely sure that everything is square. A good set of pinch sticks are the perfect tool for this and make checking for square easy, fast, and intuitive.
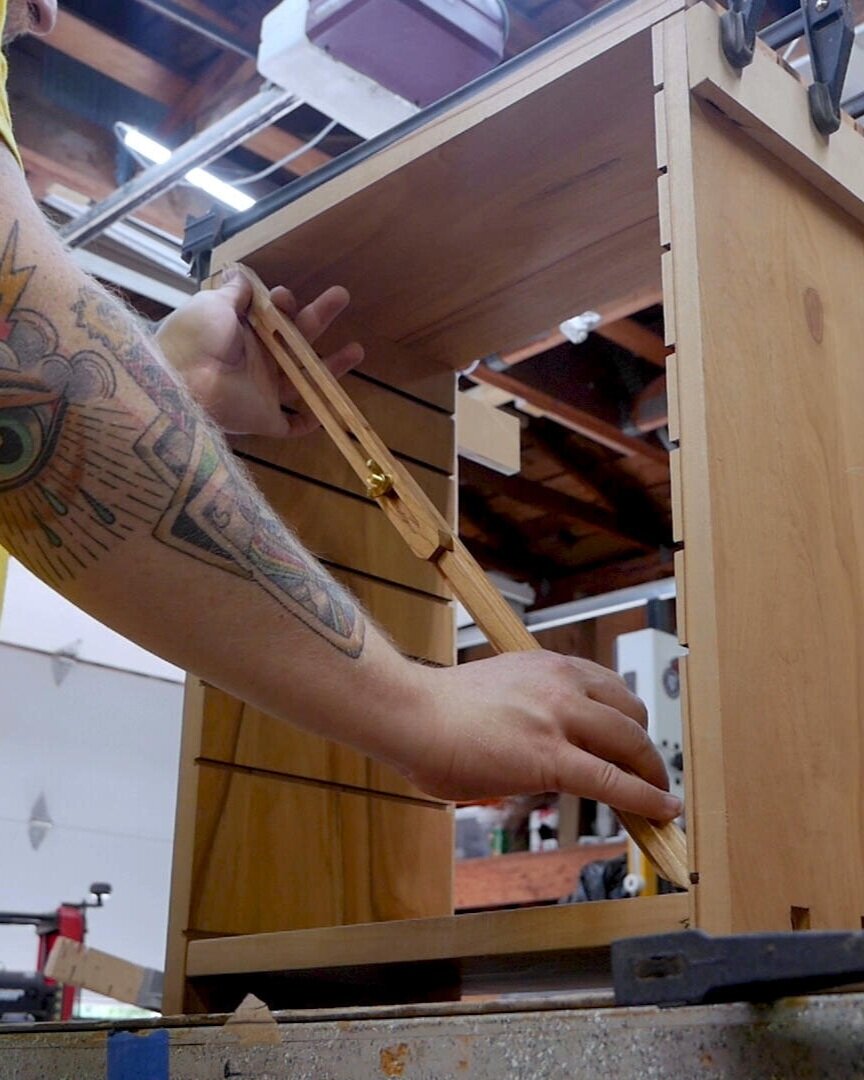
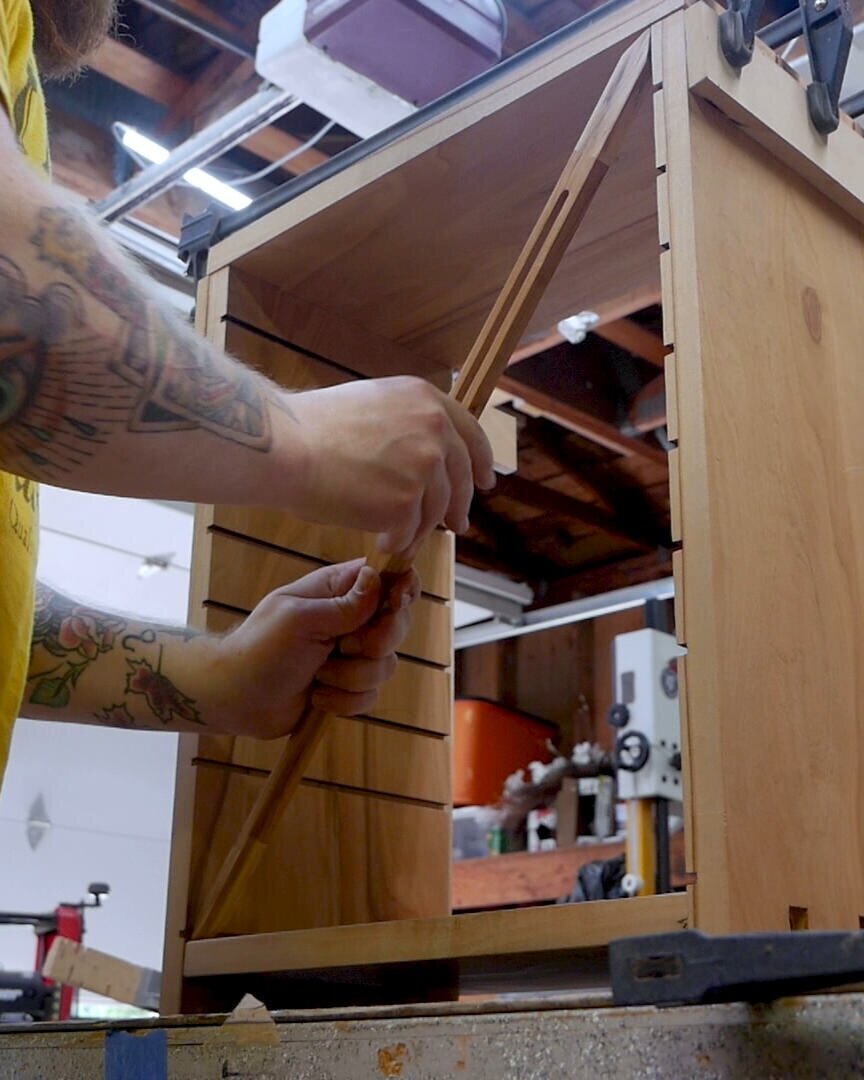
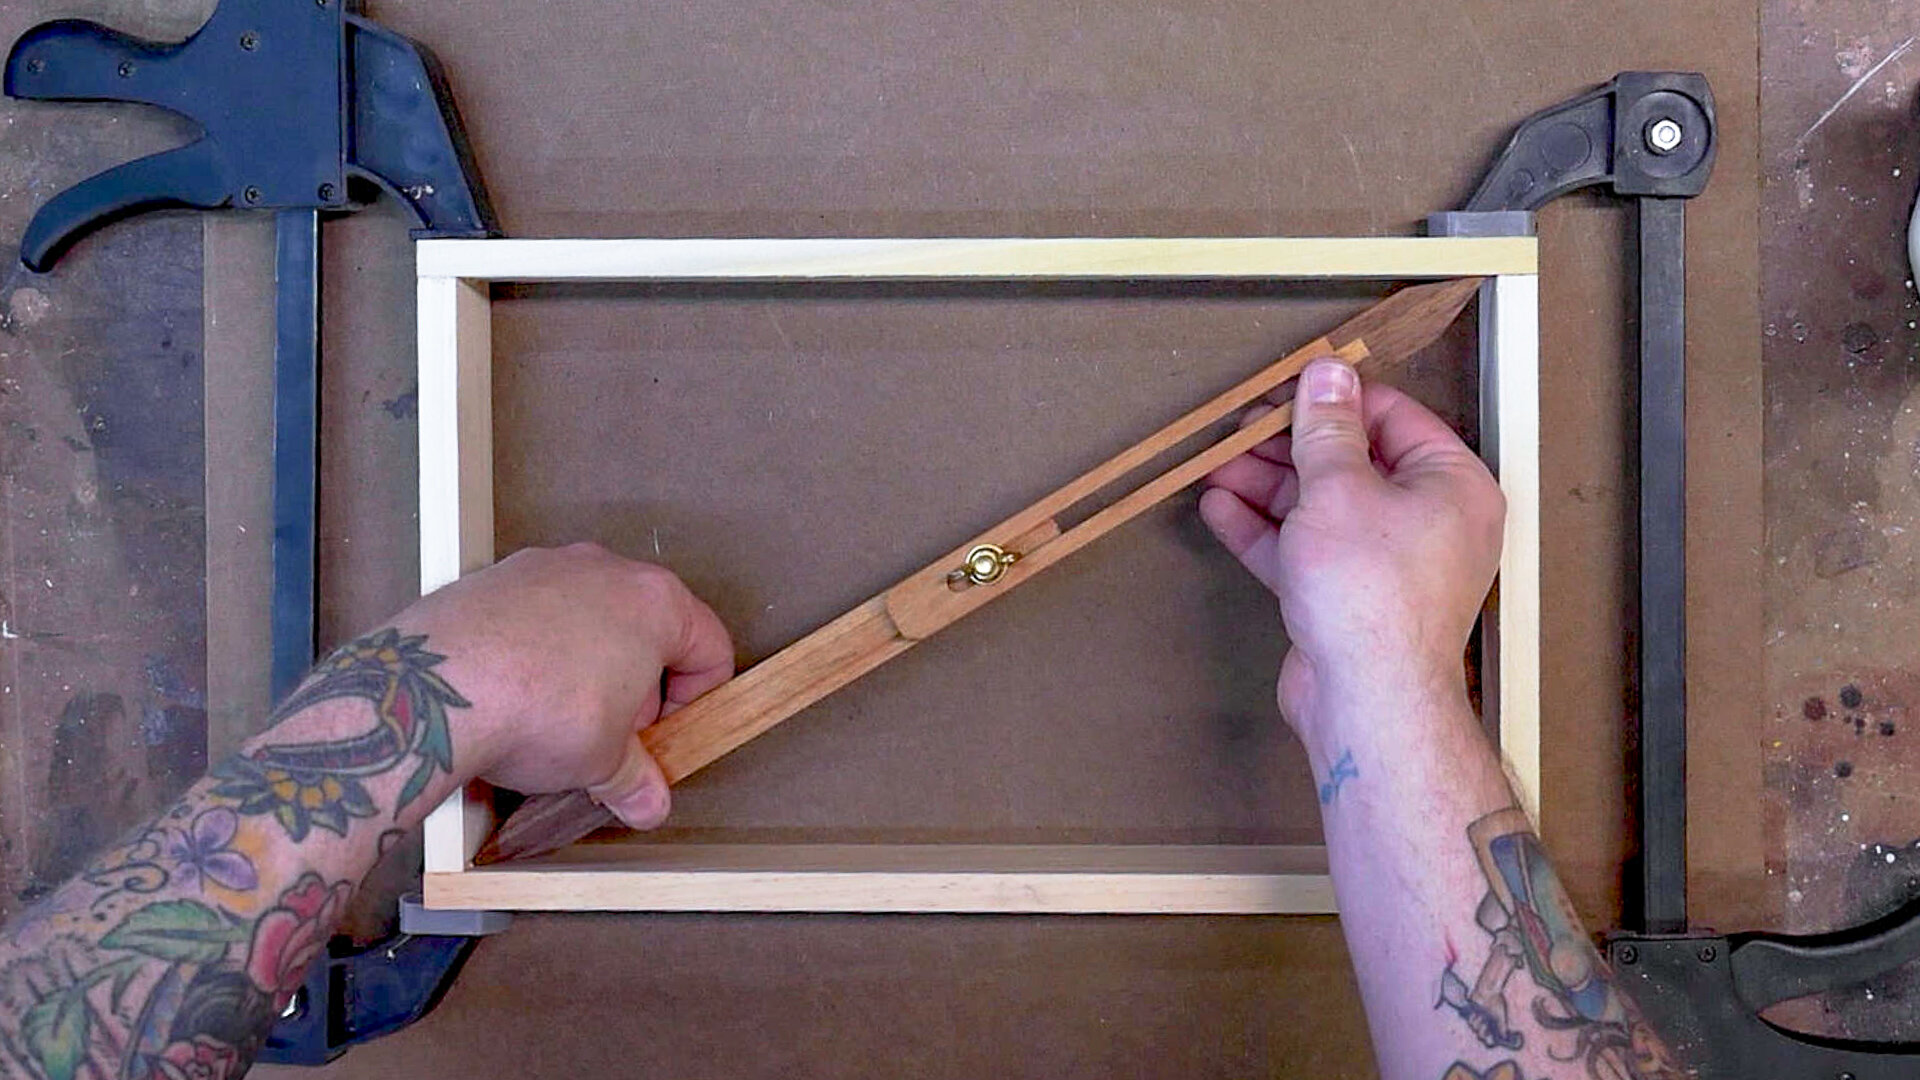
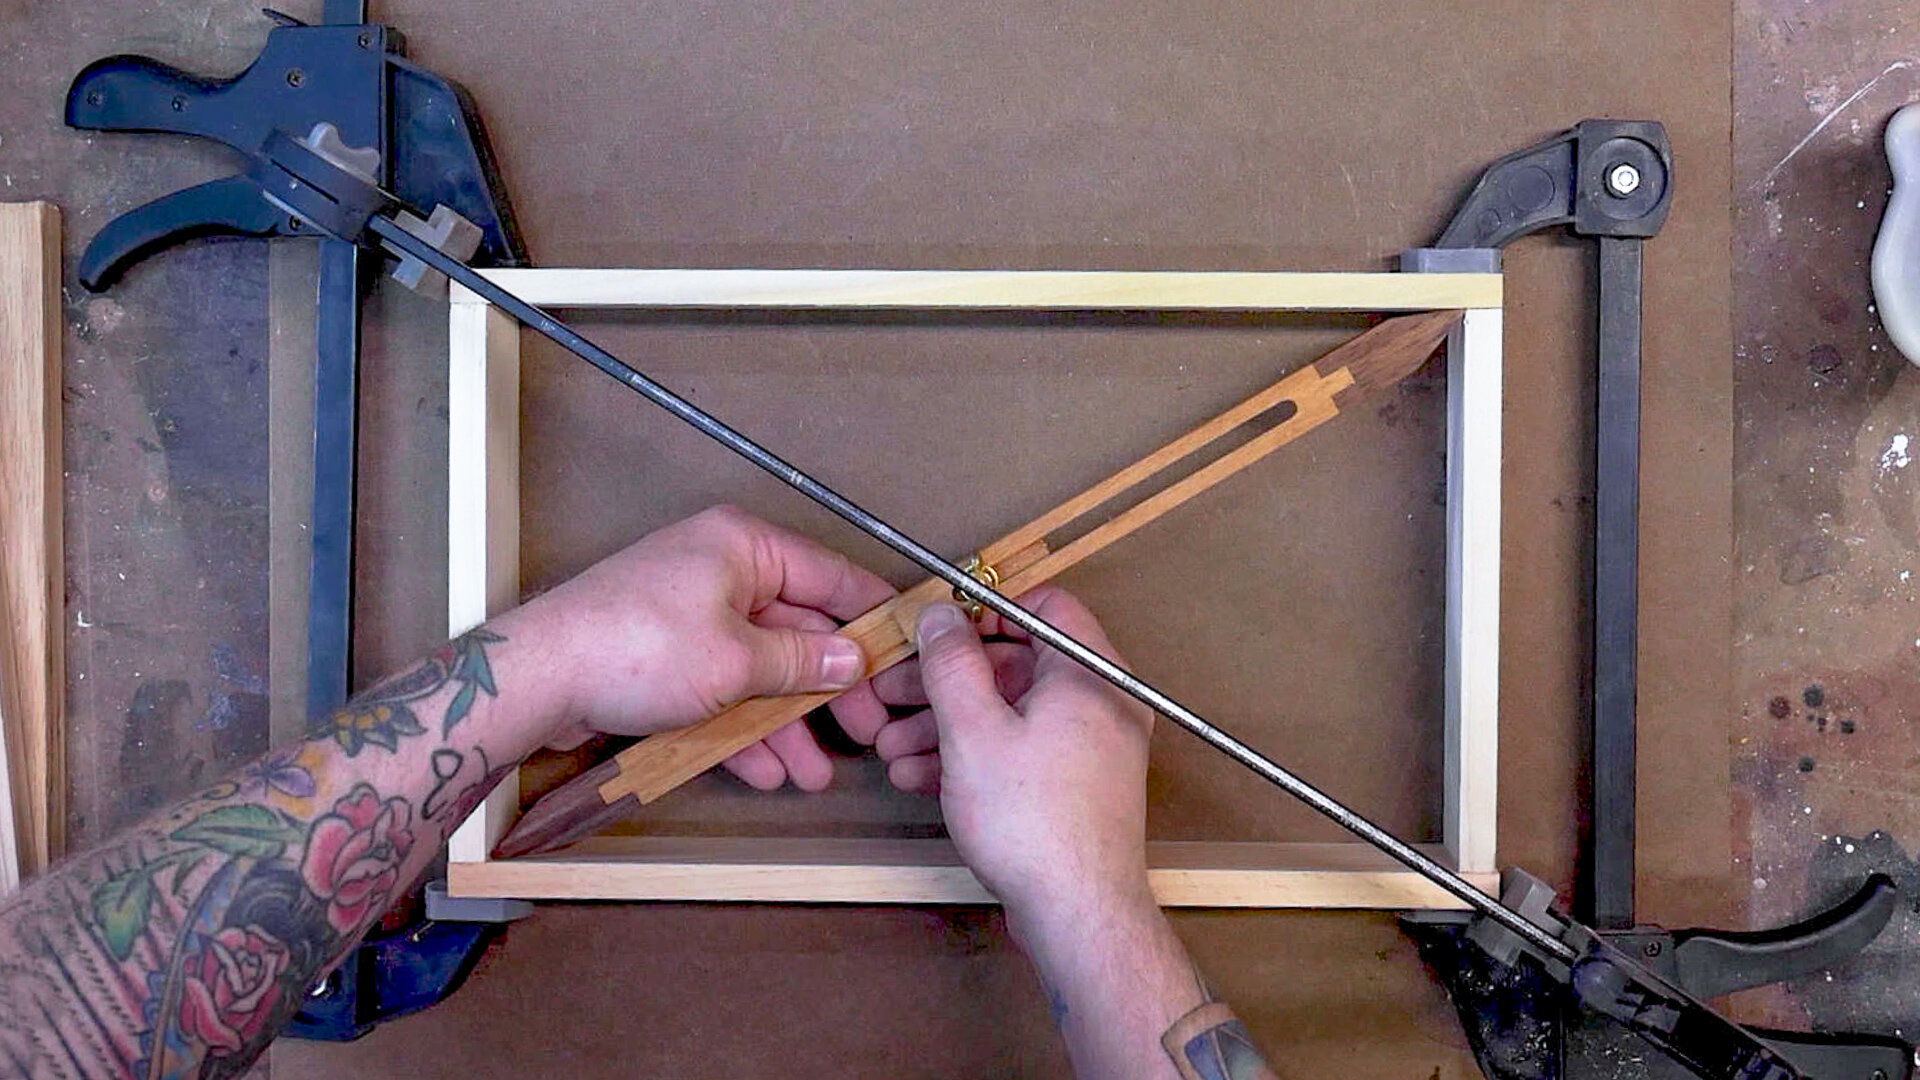
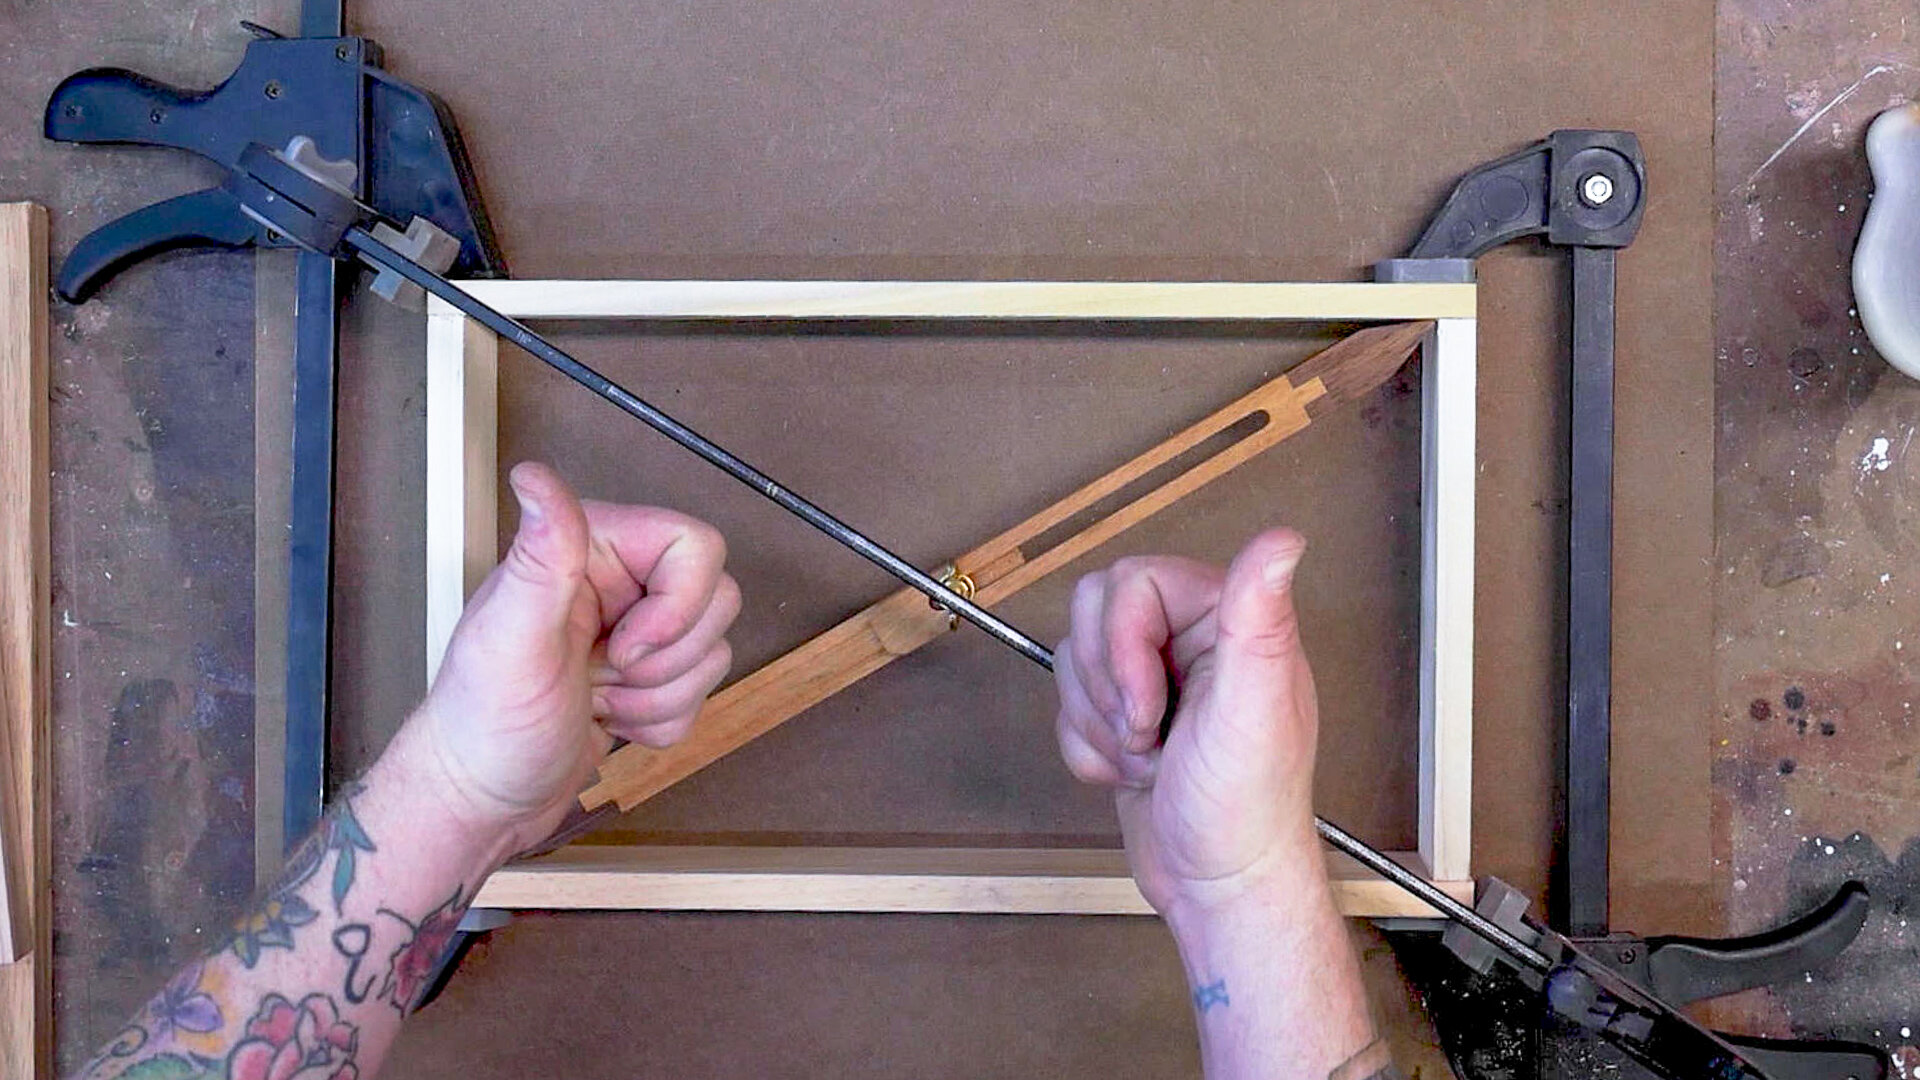
Place the two points of the sticks in opposing corners (top right, bottom left) and lock in that distance. Then flip the sticks and check the other set of corners (top left, bottom right). If the pinch sticks fit perfectly in those corners then you know that you’re in square.
If not, if the fit is too tight or too loose, the case is racked and you have a little squaring work to do.
Why does being square matter?
A square frame or case carcass is the foundation of almost any piece. Everything else references off of it. If the carcass or frame is out of square just a little the chances are high that most of the other work will not go smoothly or even work at all.
Drawers won’t fit, dados will somehow become too narrow, back panels won’t fit, doors will stick, etc..
Why not just use a real square?
I mean, after all, a square is called a square for a reason, right? So why not use one?
You absolutely could use a standard framing square or try square but you’ll more than likely be chasing that square around whatever you’re working on. As soon as you get one corner locked in the other will fall out of square, and on and on it’ll go.
Pinch sticks allow you to use one tool to very quickly and accurately dial your work into perfectly square 90º angles.
By measuring and comparing the diagonals of the case or frame, instead of checking to see if one or more corners are 90 degrees with a square, you can be absolutely sure with pinch sticks in just two measurements.
AKA a better result with fewer steps.
Isn’t that what a tape measure is for?
Couldn’t you just measure the diagonals of a frame or carcass and get the same result?
Yes, you absolutely could, and in some cases a tape measure might be faster, but there’s something very tangible about pinch sticks that make squaring something very intuitive.
On top of that, there are some instances where it becomes very difficult to use a tape measure on the diagonal. Either there’s something in the way, you’re having trouble keeping the tape on the corner, or a number of other problems could be occurring.
There are almost always many different means to reach an end, it just so happens I prefer squaring sticks over measuring the diagonals for square with a tape measure.
How To Adjust For Square
So you’ve used your pinch sticks, you’re in the middle of a glue-up, and all signs are pointing to a racked case (a parallelogram in essence), what do you do?

In our example, the diagonal distance between D and B is longer than A and C.
Take a long clamp and place it corner to corner on the diagonal that is longer than the other (D and B). Tighten just a little and re-check.
Rinse and repeat until both diagonals are perfectly the same.
Accurate Inside Measurements
The versatility and utilitarianisms of the pinch stick don’t just stop there, though, they’re also great tools for inside measurements as the Wood Whisperer says in his article here.
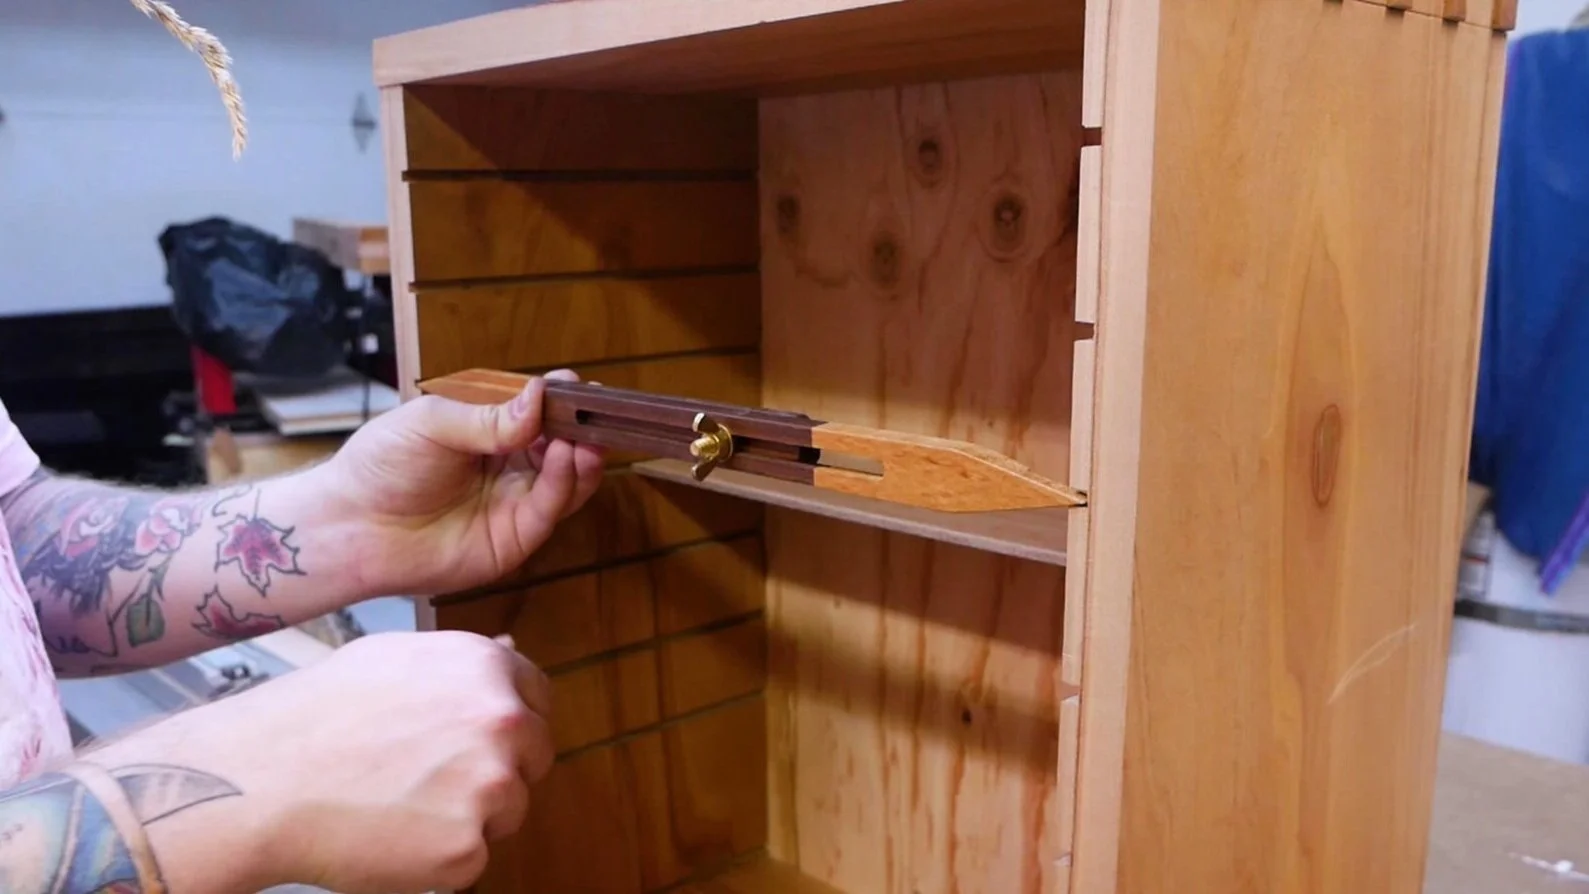
Taking inside measurements is easy with squaring sticks. Here I’m measuring the distance between two dados.
By loosening the wing nut of the squaring sticks and sliding them along their longest side you can, for example, place one point on the inside of a case side dado and the other in a dado on the opposite side, lock the sticks in place, and you now have a deadly accurate measurement of the distance between those two dados. This would be a nightmare to try with a tape measure.
Transfer Dimensions with Pinch Sticks
Let’s say you’re working on a nightstand with a drawer. The frame is built and you’re working on the drawer. Instead of planing the drawer and walking it back over to the case over and over to check the fit, you can take an inside measurement of the frame with your pinch stick/bar gauge and reference that until it’s very close, then physically check the fit.

In his article at MyBluePrint.com, Rob Porcaro uses his pinch rods to help make sure his casework is properly set up for a drawer.
He takes an ultra-precise measurement at the front of the case where the drawer will go with pinch rods, and then uses that reference measurement to check that the back of the case is just a hair wider than the front.
This ensures a nice tight drawer fit while leaving wiggle room for the drawer to slide.
Conclusion
If you had told me 3 months ago that two pieces of wood joined together with a bolt and wingnut would fast become one of my favorite tools in the shop, I would have called you crazy, and then eventually apologize because that’s exactly what pinch sticks have become.
I challenge you to build your own set of pinch sticks or squaring sticks and use them on your next project. I highly doubt you’ll regret it.
If you enjoyed this post, I’d be very grateful if you helped it spread by sharing it on social media or sending it to a pal via email.
But above all, keep up the good work, because there’s good work in the making.
Cody
- Craftswright & Makery
