
What Is A Woodworking Jointer Used For? Do You Need One?
Do I need A Jointer? What Are THEY USED FOR?
Pay a visit to most any professional or hobby woodworking shop and you’ll likely see a jointer. But what is a woodworking jointer used for?
Woodworking jointers are used to make one face of a board, and one adjacent edge, perfectly flat and square to each other. Jointers are also great for flattening out cupped boards, removing twist, and preparing board edges to be glued together. If you have any notion to work with rough lumber, you may want to consider getting a jointer. If you’re curious how jointers work, and if you need one, check out the rest of the article below.
How A Jointer Works
We know now that a jointer is used to flatten the face or edge of a board, but how does it do that? The secret to how a jointer works lies in its cutter head, infeed table, and outfeed table. These three components work in harmony enabling the jointer to effectively flatten the stock.
Here’s how:
The infeed table and outfeed table are coplanar to each other, meaning they are perfectly flat and with no twist.
The blades on the cutter head of the jointer are dead-flush with the outfeed table.
Raising or lowering the infeed table adjusts the depth of cut.
As wood is fed into the cutter head, material is removed making that face or edge of the board parallel to the outfeed table.
Most of the time several passes over the jointer are needed but with each pass, the side of the board that’s being worked on becomes flatter and flatter (so long as your jointer is properly set up and used correctly).
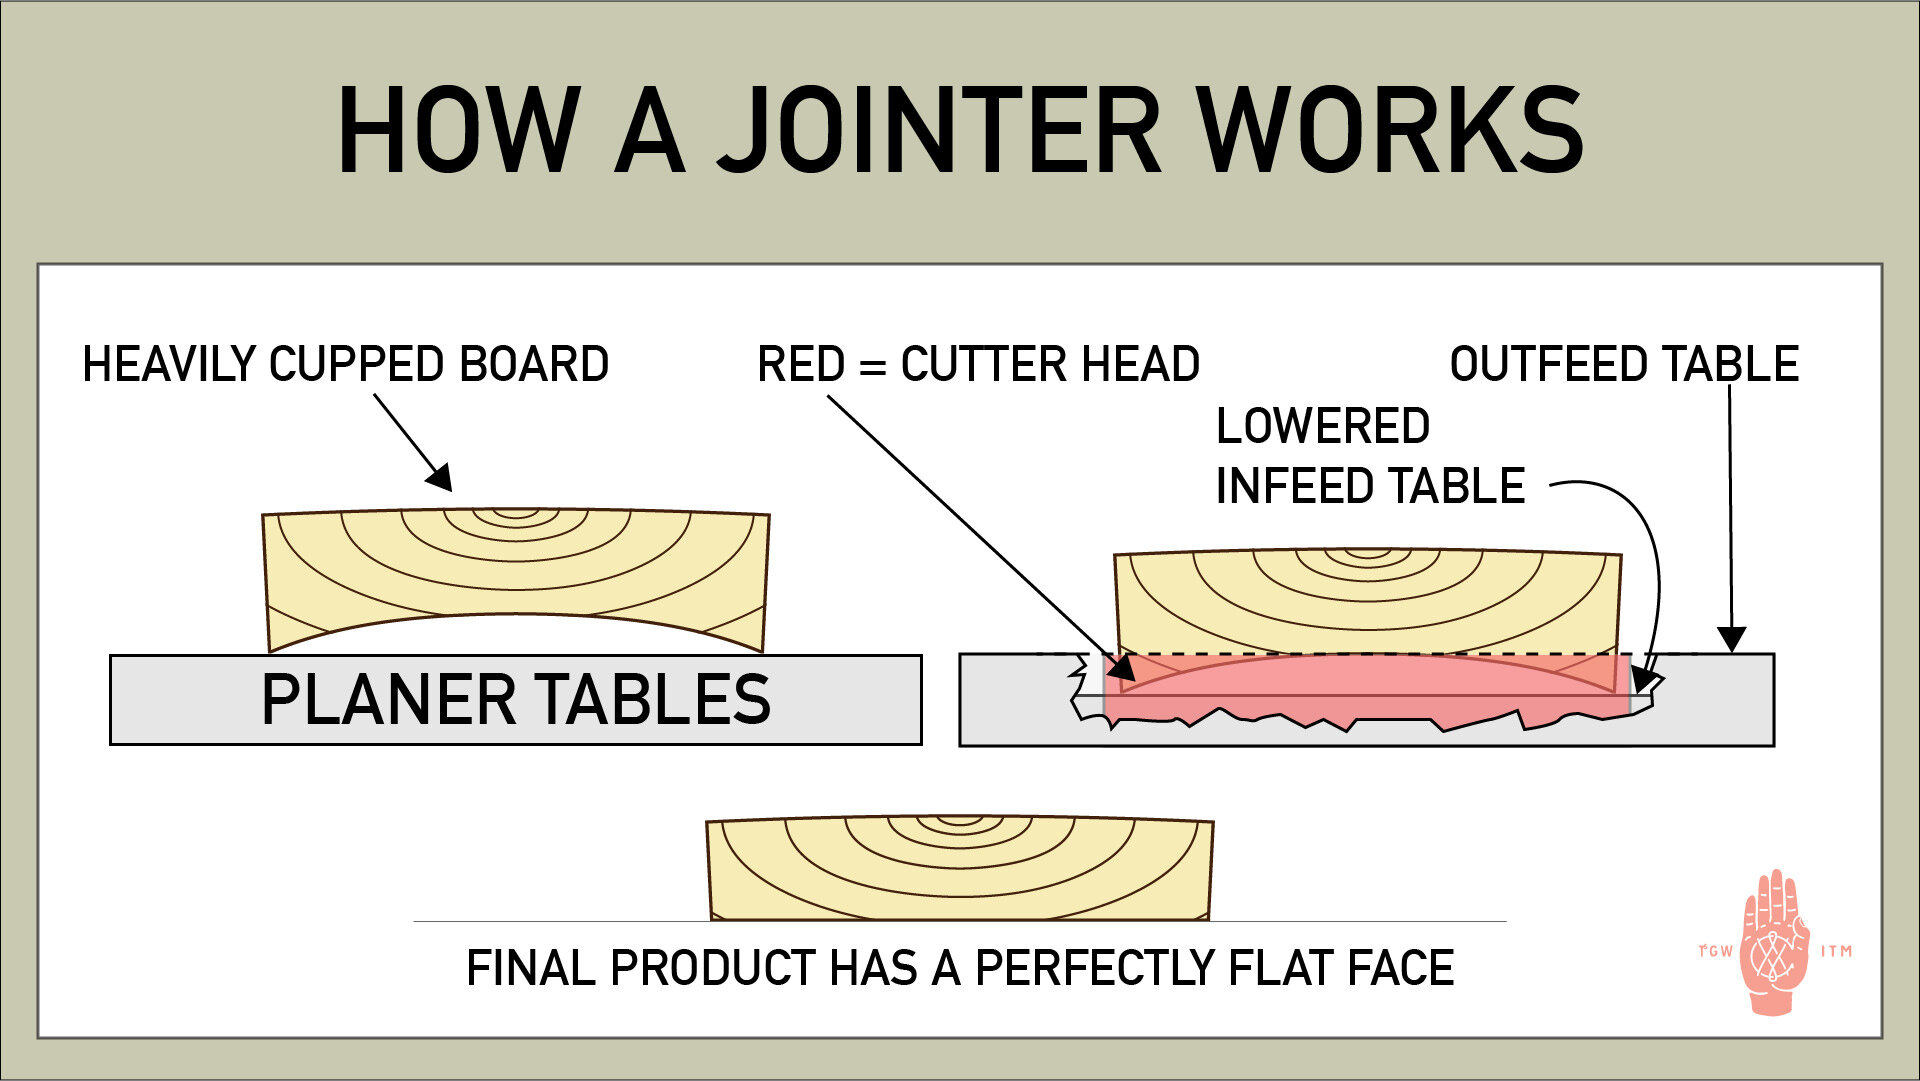
As you can see in this EXAGGERATED graphic of a cupped board, by lowering the infeed table so that the cup is below the cutting blade, we can remove the cup and produce a flat face. I say this is exaggerated because normally the average depth of cut on a jointer is around 1/16” - 1/8”, and you would make several passes until the distortion in your board is gone.
Do I Need A Jointer?
That will depend a lot on the type of woodworking you do and how often you’re in the shop. If you’re just getting started, dabbling, or getting your feet wet with woodworking my suggestion would probably be to not invest in a jointer. Simply purchase your lumber already milled in S3S or S4S form (surfaced on three sides or surfaced on 4 sides).
If you’re at a point in your woodworking where you’re starting to use rough sawn lumber, say from a lumber mill or your local sawyer, then a jointer is absolutely essential to your shop workflow.
I’ll take that back, just a hair: a jointer isn’t absolutely essential, you could do all of your stock prep and dimension with hand tools, but that might turn out to be more work than you’d like to do.
That being said, a jointer is so important to most any woodshop that Popular Woodworking, and other sites, often recommend a jointer as the first power tool to invest in for a new or growing shop.
Your local lumber mill may also have an option for you to have your wood surfaced by them, which is a good third option for some people.
How Big Is A Jointer?
Jointers come in many shapes, sizes, lengths, and heights, but the most common size you’ll see is a 6” jointer. That means that the blades are 6” long and the widest material that the jointer can handle (for a face joint) is 6”.
For most hobbyists or intermediate woodworkers, this will work just fine. But if you find yourself often working with stock wider than 6” you might want to consider looking at larger, wider, models.
Another factor in jointer size is bed length; how long the infeed and outfeed tables are. This is important because the longer the bed size is, the longer the boards you can successfully joint can be.
The general rule of thumb for a jointer is it can successfully process boards twice the length of its bed. So a 6’ jointer can accurately joint a 12’ long board.
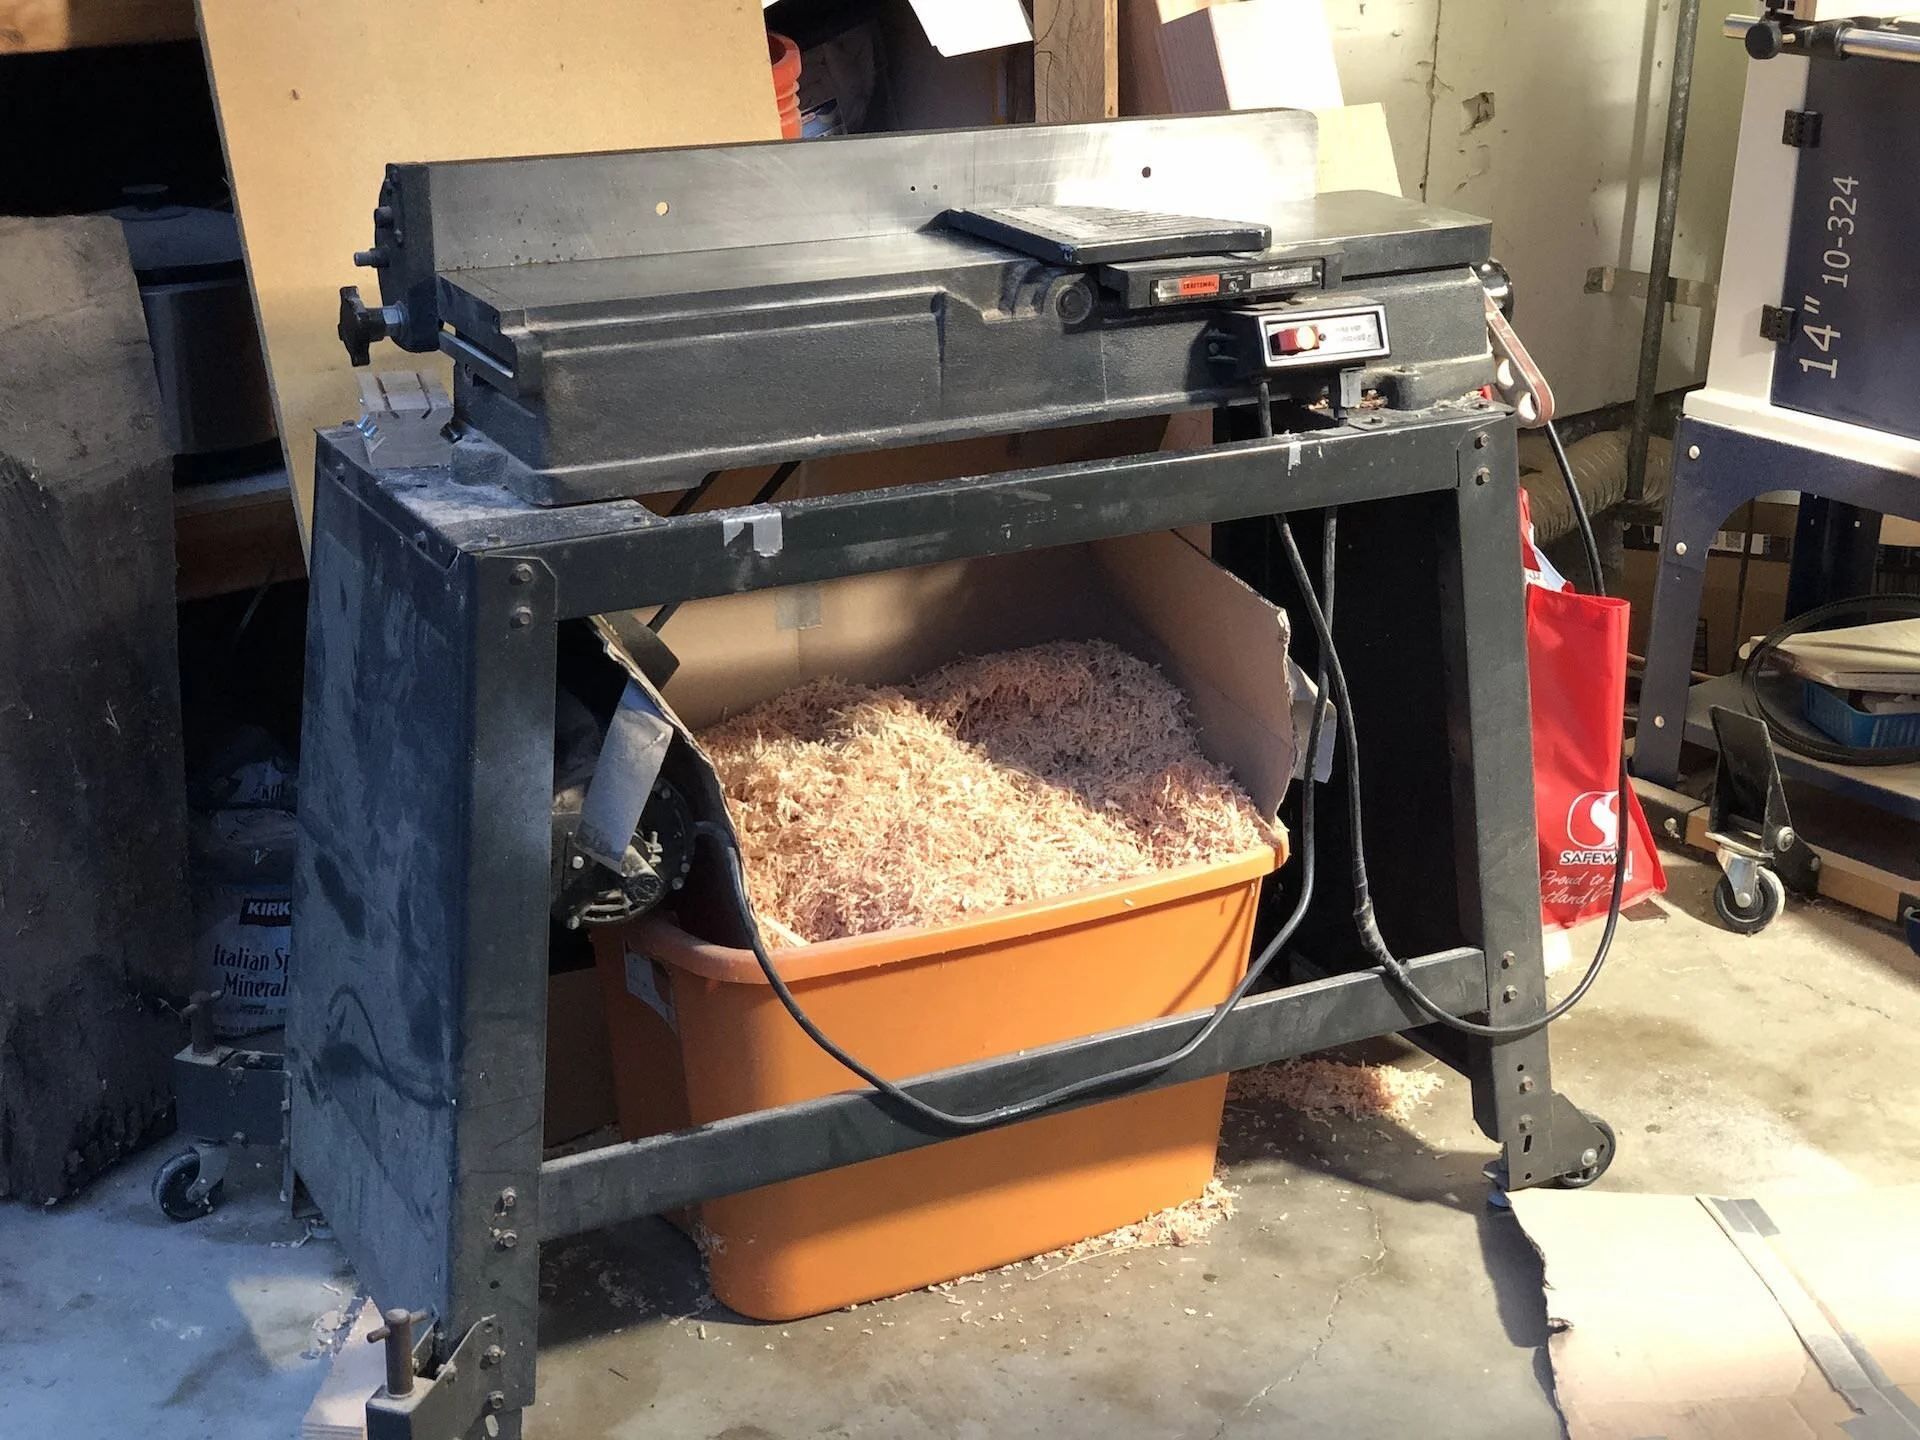
I personally use a 6” Craftsman jointer on a rolling stand that I picked up off Craigslist for ~$200. Is she the prettiest thing on the market? No. But she works and works well.
I’m also saving up to purchase a larger one as soon as I can ;)
Power Jointers vs Jointer Planes
Before there were power jointer machines there were jointer planes. These are longer versions of the standard hand plane that you would normally associate with woodworking. Typically a board would be roughed in with a scrub plane, one designed to remove a lot of material quickly, before the final surface was achieved and the board face is flattened with a joiner plane.
When milling lumber, you’re trying to bring the peaks and valleys in the wood to one equal plane. Jointer planes are extra long so that they can more easily ride over these peaks and valleys in the wood without following them.
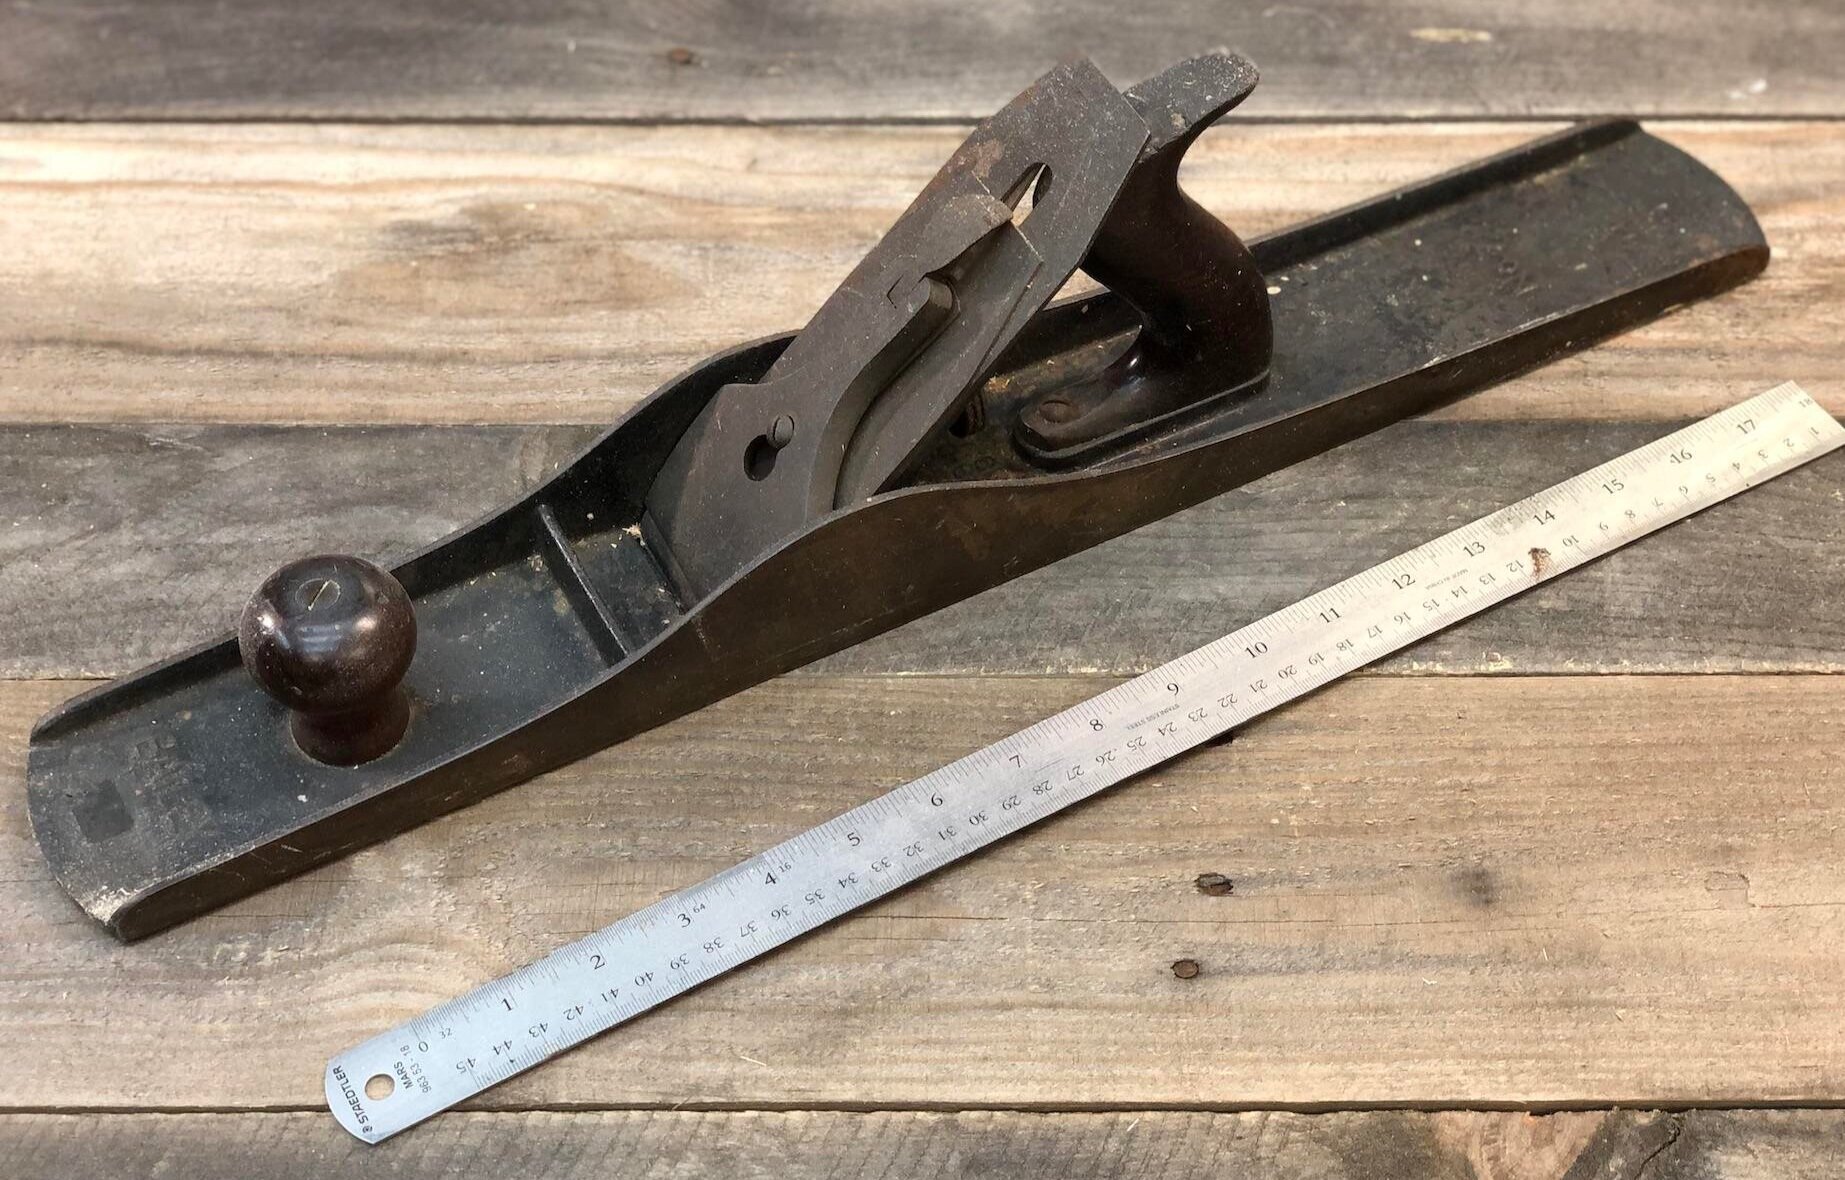
One of my Bailey No. 9 jointer planes, soon to be restored, next to an 18” ruler for scale.
Just like with a power planer, the longer the bed or sole of your jointer the easier you’ll be able to achieve a perfectly flat board. This is because there’s a bigger flat area to reference.
In my own personal workflow, I like to use my jointer to get the majority of the work done, then I refine my faces and edges with a jointer plane. One benefit to this hybrid woodworking method is that most power jointers will leave a very subtle scalloped surface on the board. This is due to the blades literally cutting out little scoops of the wood as it passes over the cutters. By running a jointer plane over the wood you can quickly remove those “ripples” while making sure your board is dead flat.
Can You Use A Jointer On Both Sides?
Technically, yes you can. Is it recommended? No.
At first glance, it’s easy to assume that one could use a jointer to square and flatten all four sides of a board. In theory, it is possible, but there are better procedures to accomplish the same goal.
What we should focus on is that you can make all 4 sides of a board flat with a jointer, and two perpendicular sides square to each other, but you can’t make opposing sides parallel to each other.
If your jointer beds are not 100% on the same plane, either one being higher or lower, or one being twisted in comparison to the other, all you’ll accomplish by jointing an opposing face of the board is the creation of a wedged shape.
In other words, you’ll end up with a board that has two faces that are perfectly flat, but not of a consistent thickness and most likely not parallel to each other.
That’s why a planer is the perfect complement to a jointer.
Jointer Planer Combos
It used to be if you wanted to square up and surface your wood you’d need at least three machines in your shop: a jointer, a planer, and a table saw or bandsaw. But in recent years jointer planer combos have been gaining a lot of traction, especially in small shops, and for good reason.

One really cool feature of jointer planer combos, like this Jet 12” Jointer/Planer Combo is that because both functions of the machine share a cutter head, they’re able to process the same widths of wood: 12”. The fact that separate jointer and planer machines can do this may be a big drawback, especially because the most common and popular planers are almost always wider than their jointer counterparts.
The fact that jointer planer combos are of compact design is another great feature. By combining two machines into one you can greatly reduce the overall footprint in your shop, possibly freeing up for other new tools.
This 2-in-1 design, however, can be a drawback for some people. If you’re the type that works best by bouncing back and forth between machines, instead of batching out one procedure before the next, you may not be a fan of the combo machines. They do require a little bit of time and effort to switch from one function to the other.
Just Be Careful
As with any piece of machinery, always make sure to exercise proper safety and operation techniques.
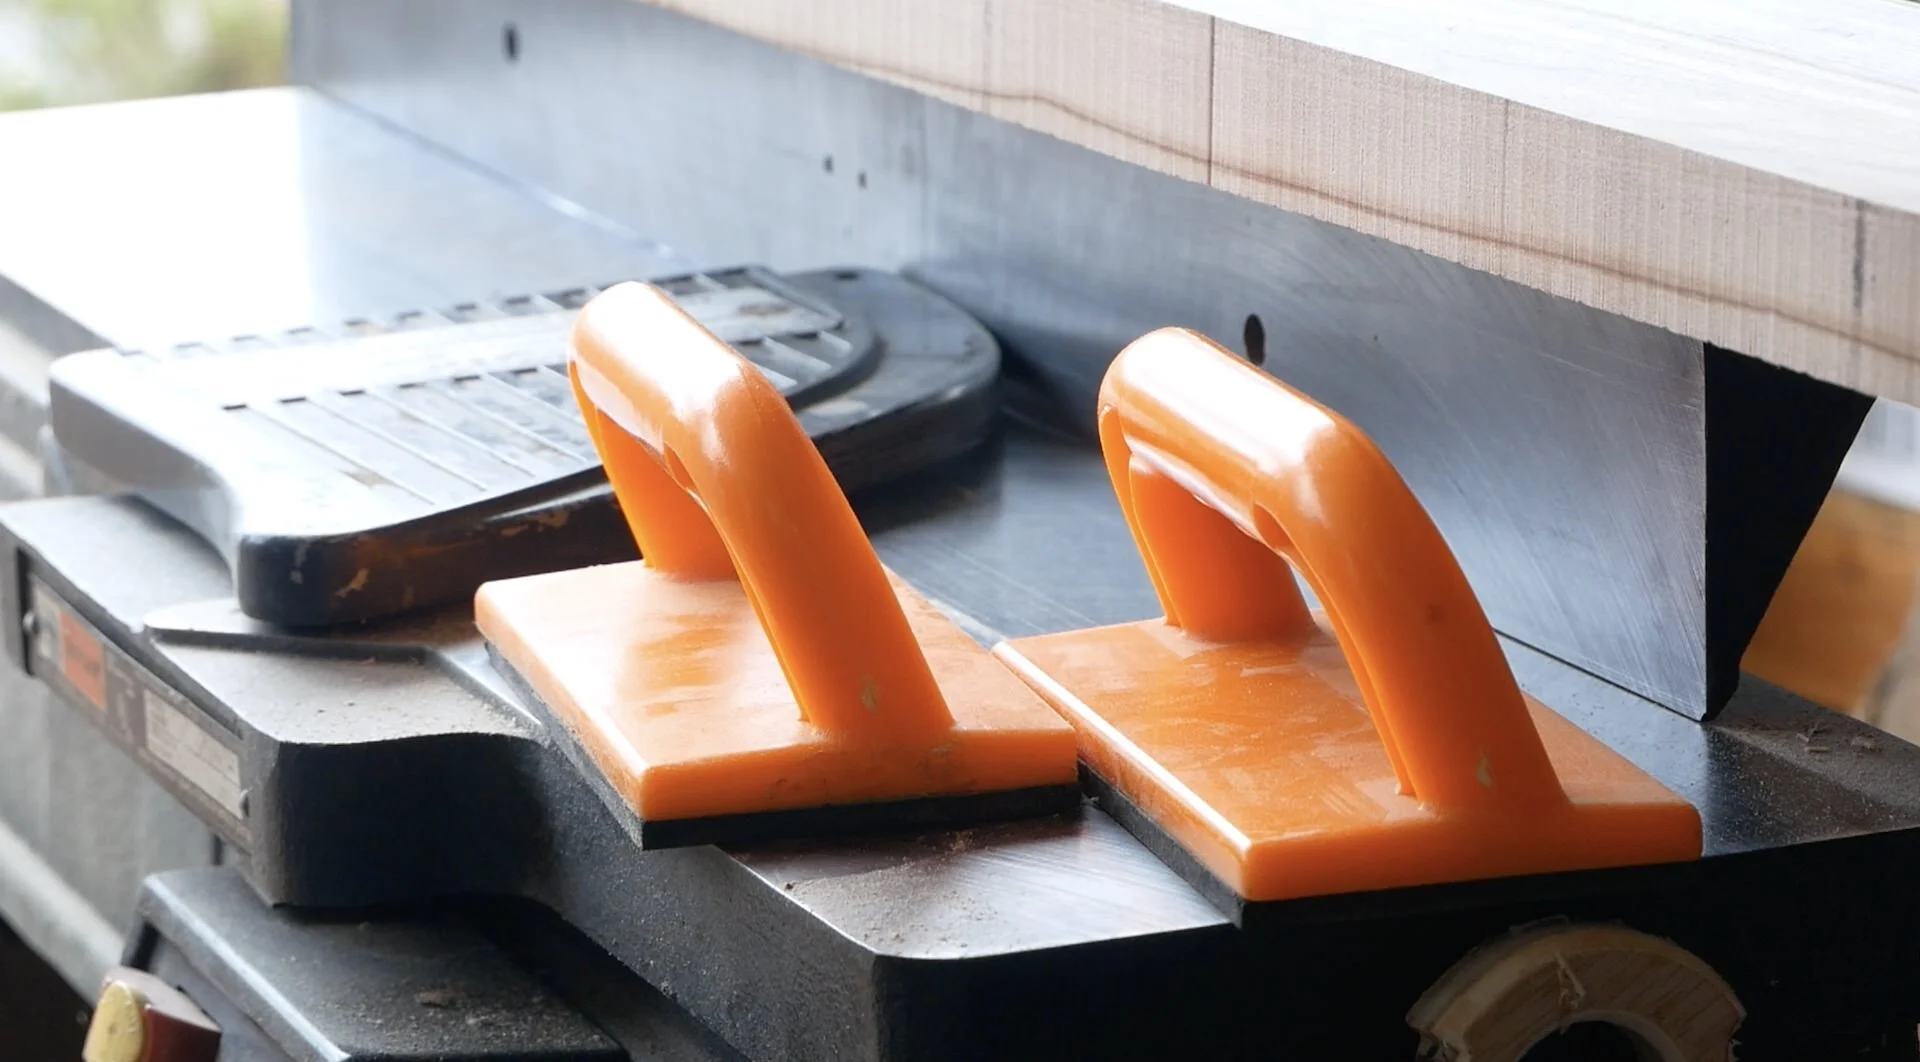
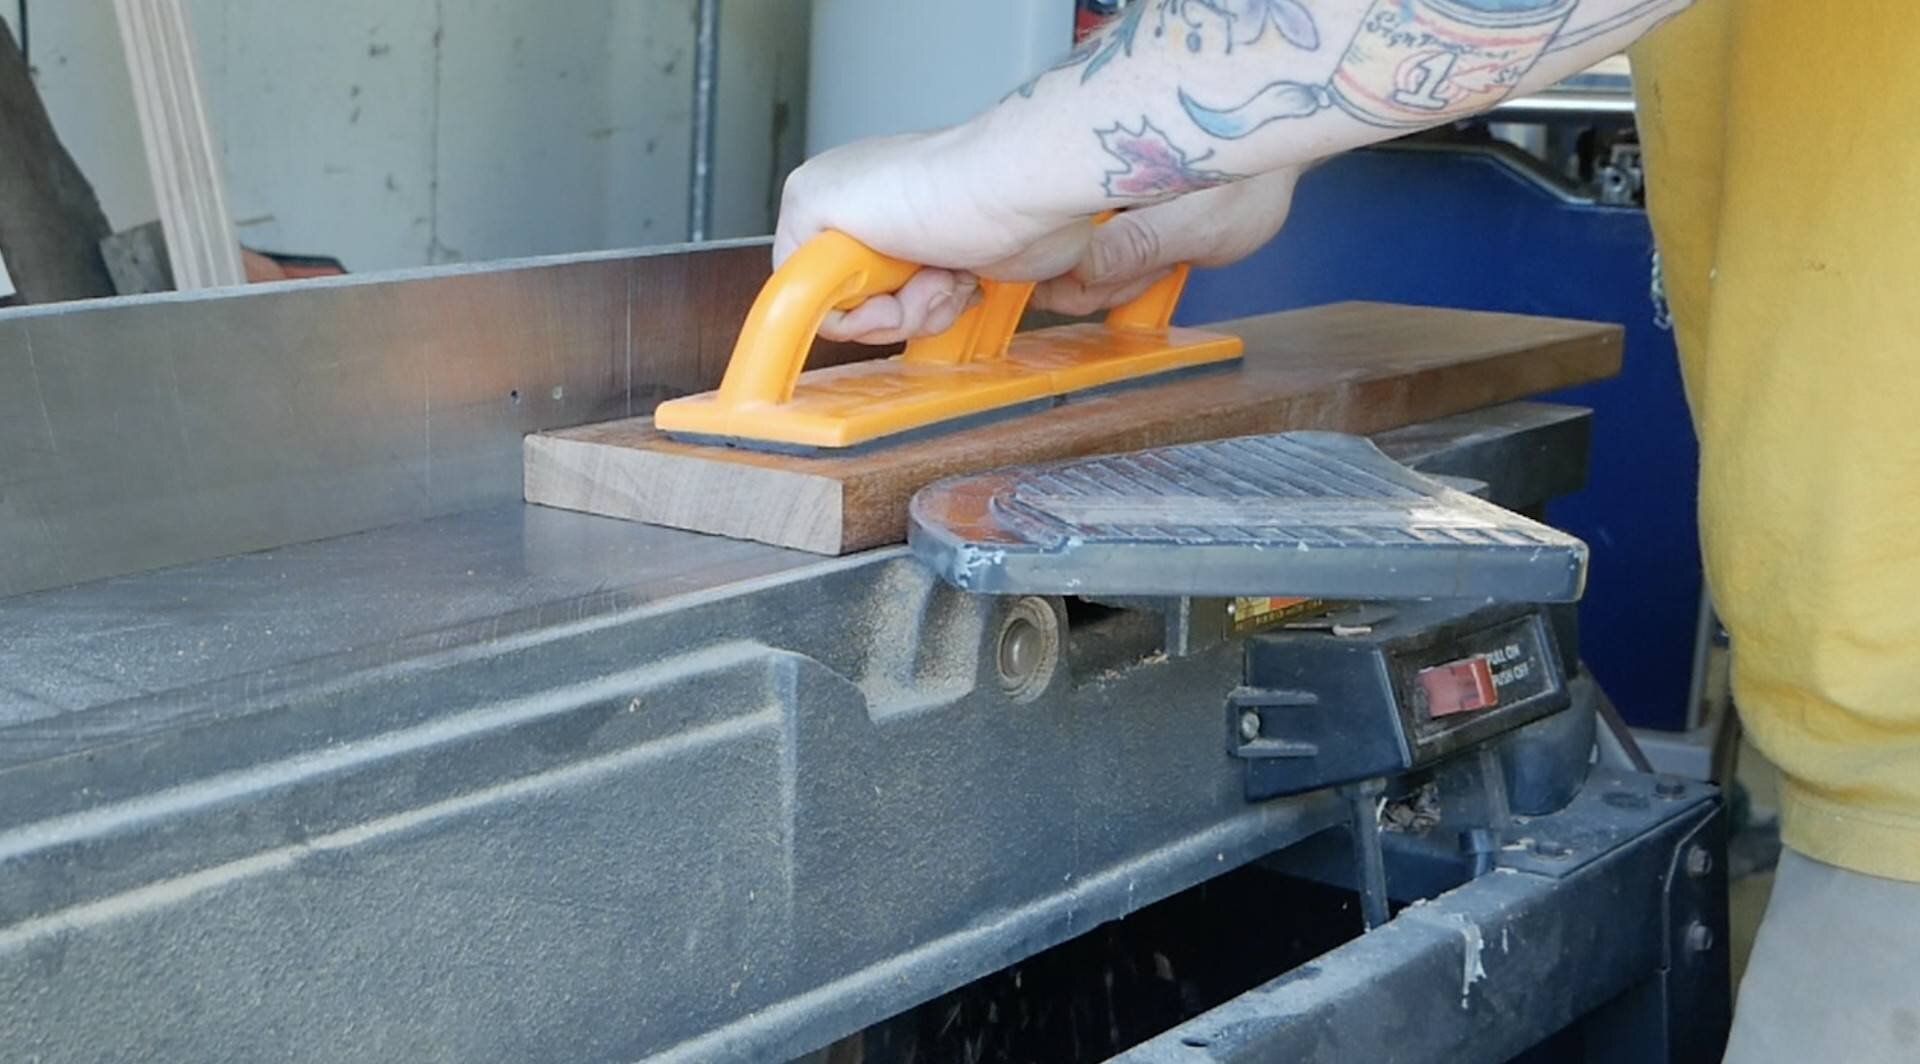
I personally know two woodworkers that have lost parts of their fingers to jointers. But don’t let that you deter you, jointers can be perfectly safe to operate when done correctly, meaning: push blocks are used, grain direction is accounted for, the machine is tuned up, no loose clothing is worn, and body parts are kept away from the scary sharp knives spinning at thousands of RPMs just in case the wood your working on decides to kickback or break.